Steps for Snapshot Management
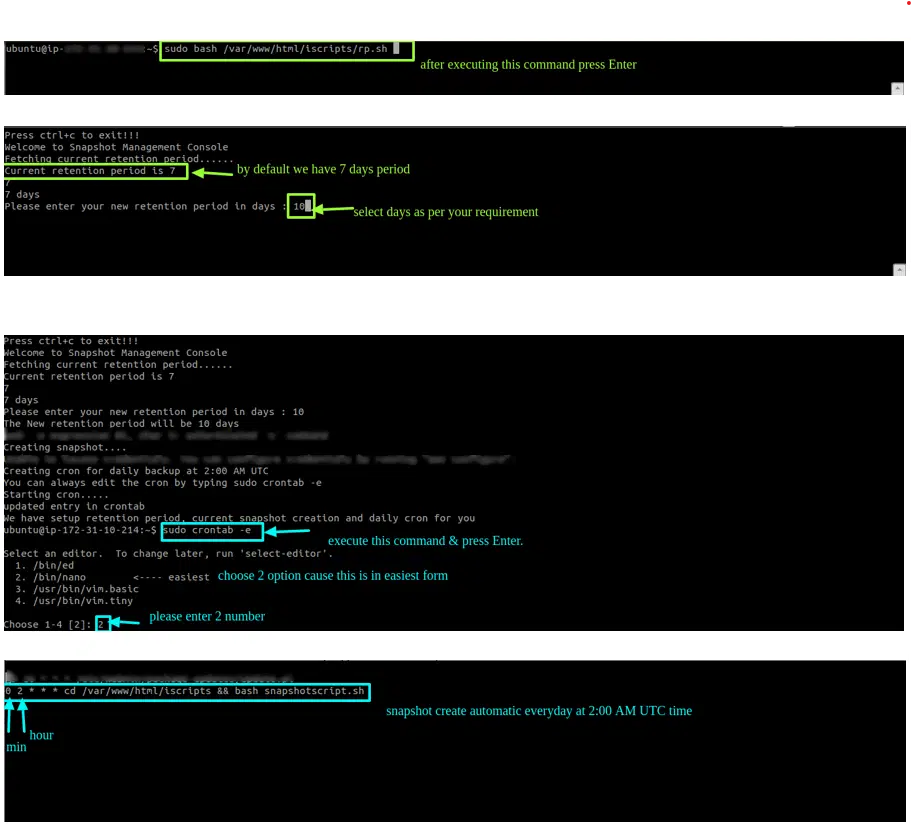
Note: For running the script you need to install AWS CLI in the terminal with user ubuntu. You can install by typing sudo apt-get install awscli –y OR you can refer the following URL https://docs.aws.amazon.com/cli/latest/userguide/install-linux.html. Once you installed the AWS CLI you need to enter the AWS IAM user credentials by typing aws configure.For Snapshot Management, we have created a script that helps you to set a retention period for the snapshots. This script will create a cron for automatic backup at 2:00 AM UTC.By default we are not running the script, you can run it by logging into the terminal or shell with the instance login method and then type the below command : sudo bash /var/www/html/iscripts/rp.sh
1. After logging into AWS, select the preferred region, Then select the EC2 service

2. Click on Instances and then select your instance to Connect

3. After Selecting connect. You will see a page similar to below image. Windows Users: Please convert .pem key to ppk via puttykeygen software. You can follow this by step-1 to access your instance. UNIX/LINUX/MAC Users: Go to the location of .pem key and follow the step-3 from the image given below in your terminal to give permissions to the pem file. Next, you can execute the command in your terminal for accessing the server which can be found in the Example section of the image given below. (Remember this command is run only .pem key location and use ‘ubuntu’ or ‘ec2-user’ instead of root).

4. To connect to the instance, execute the command as per the above screenshot
Note: replace the username with ubuntu instead of root
Attach IAM Permission Role
1. In IAM Service , Go to Dashboard and click on Roles and create a new Role

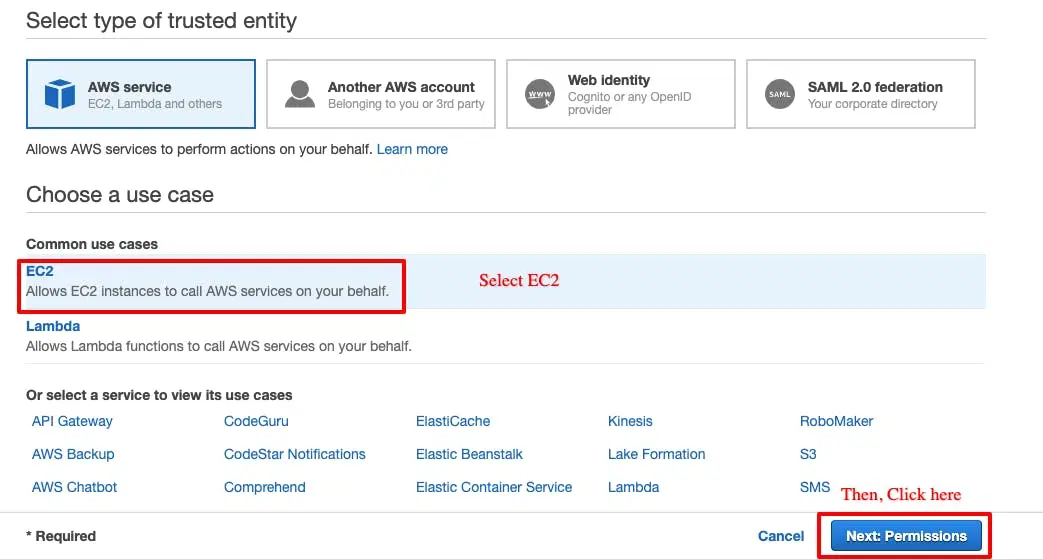
2. Now choose Role type and select Amazon EC2 and select Next Step
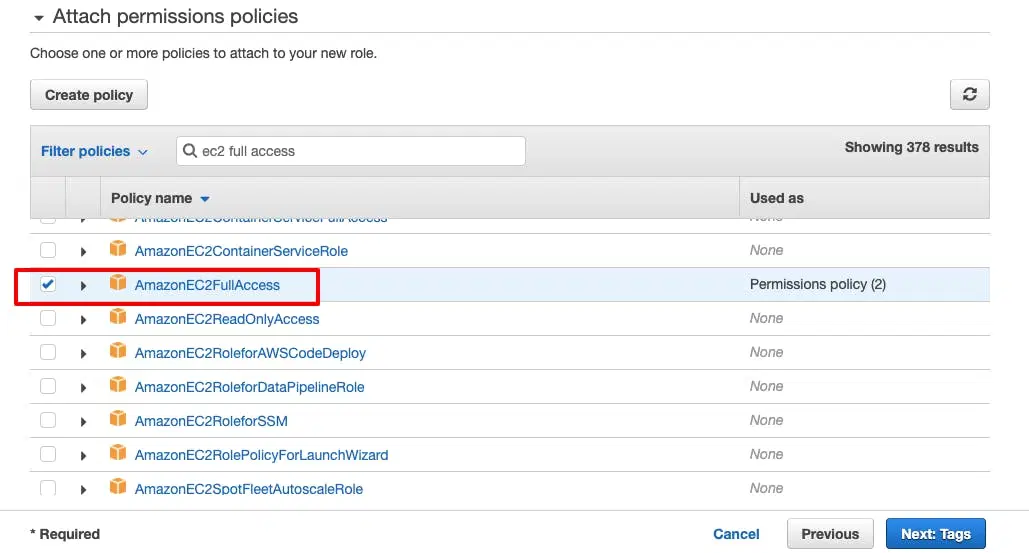
3. In the policy list select AmazonEC2FullAccess and click Next
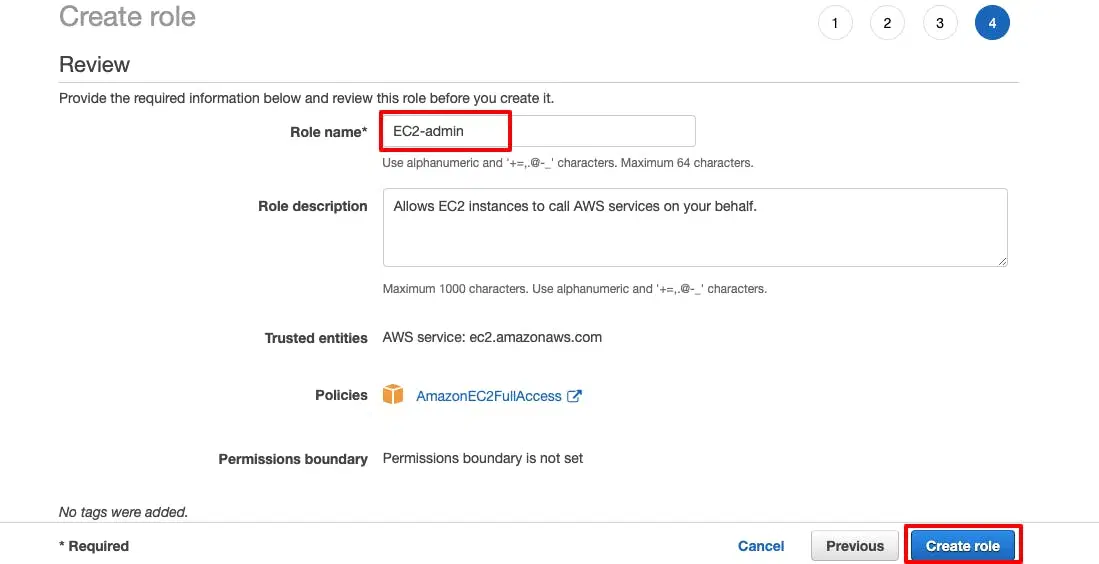
4. Now Name the Role and Click on Create Role
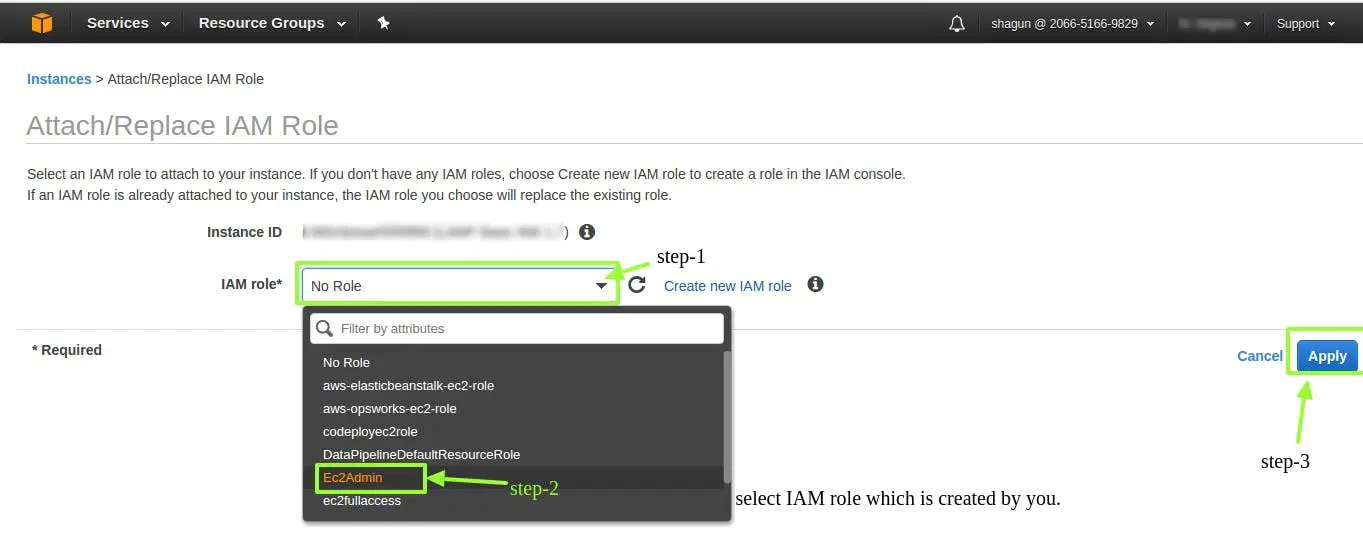
5. Now , go to the EC2 instance and select the instance, Click on Action and Select instance Setting. Now select the Attach/Replace IAM Role to Attach the role to the instance

6. In Dropdown select the IAM role which you have created previously and then Apply
7. Now once the Role is attached, log in to the terminal and run the commands below after installing AWS CLI